Do you work in pottery or ceramics? If so, you’ve likely encountered the concept of cone temperature readings. For those new to the craft, understanding the intricacies of cone readings can be a bit like deciphering a cryptic code. But fear not, we are here to help demystify this essential aspect of ceramic firing.
Want to make a ceramic glaze using a pyrometric cone? Watch CMW’s YouTube video: Cone-ception | Using a Pyrometric Cone to Create a Ceramic Glaze
Cone Bending 101: A Quick Recap
For those new to the ceramics world, let’s recap the basics:
- Cones as Temperature Guides: Ceramic cones are small, pyramid-shaped objects made of ceramic materials. They’re designed to melt and bend at specific temperatures, giving us a visual indication of what’s happening inside the kiln. (A kiln where you should be testing and maintenance properly… right?)
- The Cone Chart: This handy chart lists different cone numbers, each corresponding to a specific temperature range. By using cones that match our desired firing temperature, we can ensure our clay and glazes mature properly.
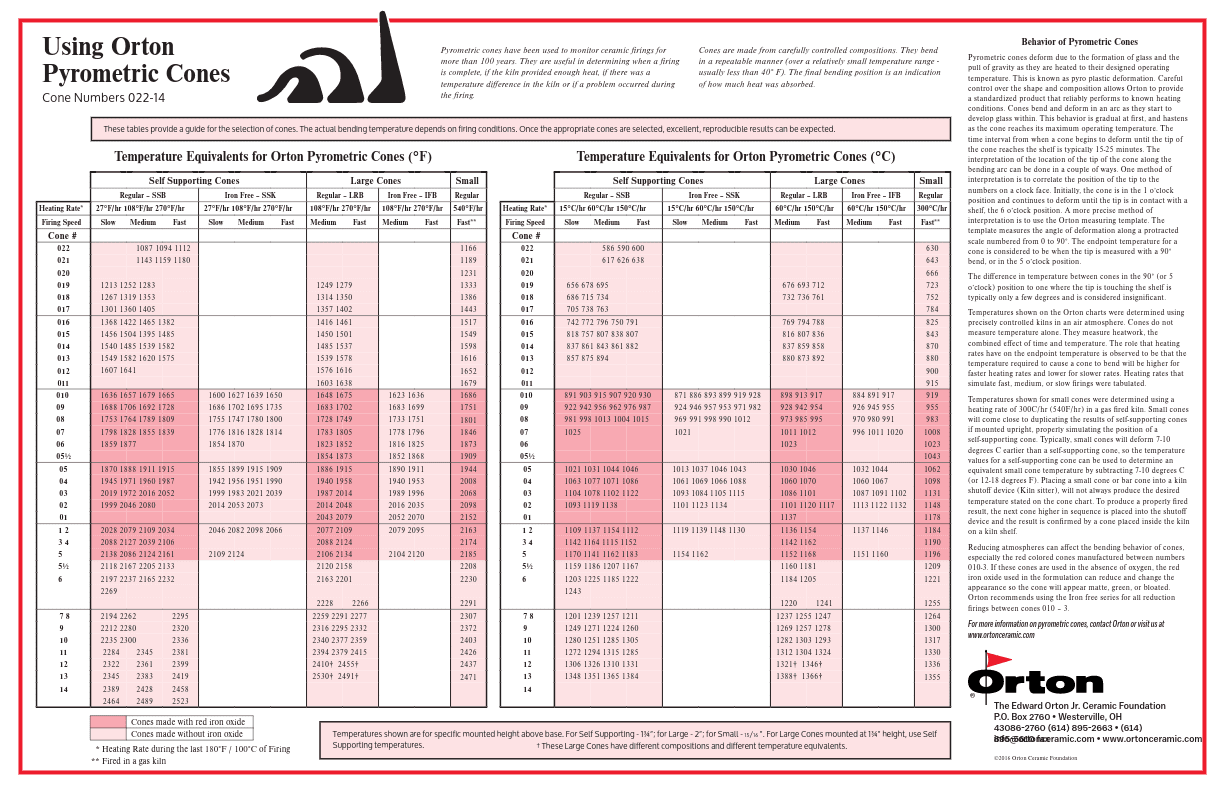
How do I even read this chart? Read our article Ceramic Cone Chart: Deciphering Kiln Firing Rates for Best Results
Cone Bending Process
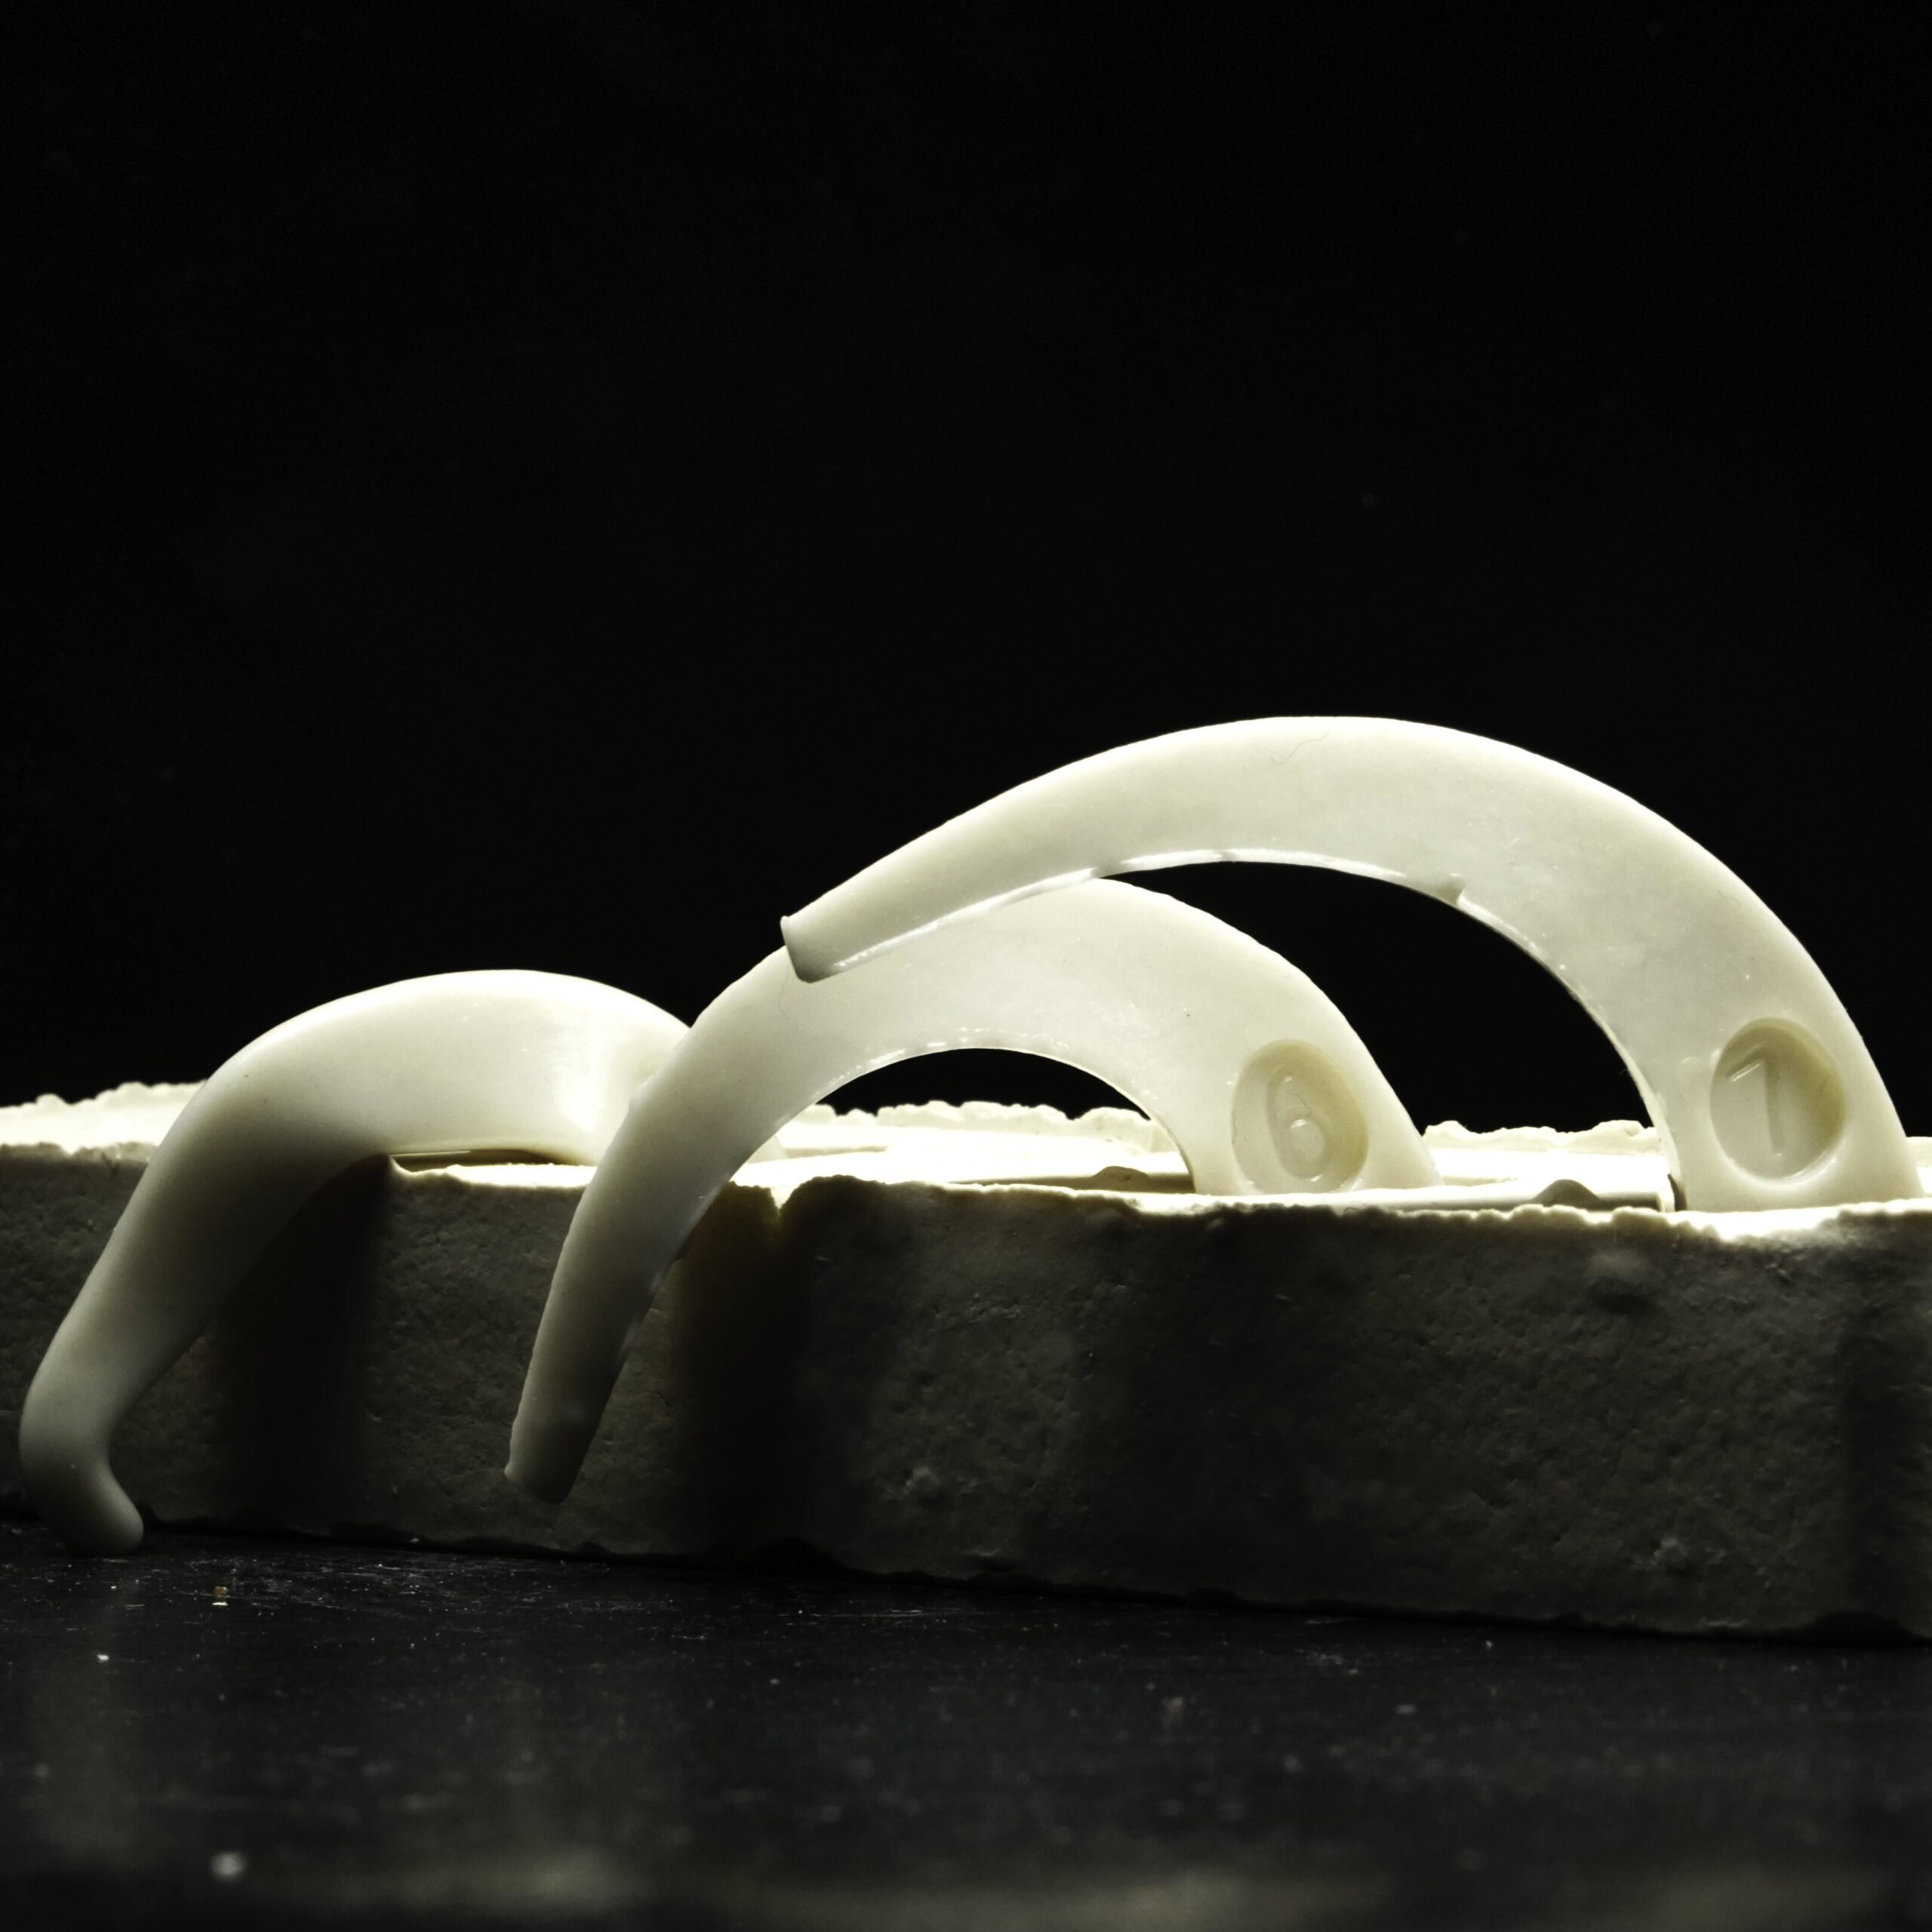
Below we have a cone before the firing process! As it absorbs the intense heat within the kiln, it begins to bend, gradually conforming to the laws of thermodynamics. This bend, dear readers, is what we refer to as the “perfect cone.”
Many enthusiasts believe that a cone reaches its ideal temperature when it bends to a particular angle, such as pointing to three o’clock on a clock face.
However, according to the instructions provided by Orton, a renowned authority in the ceramic industry, the truth lies elsewhere.
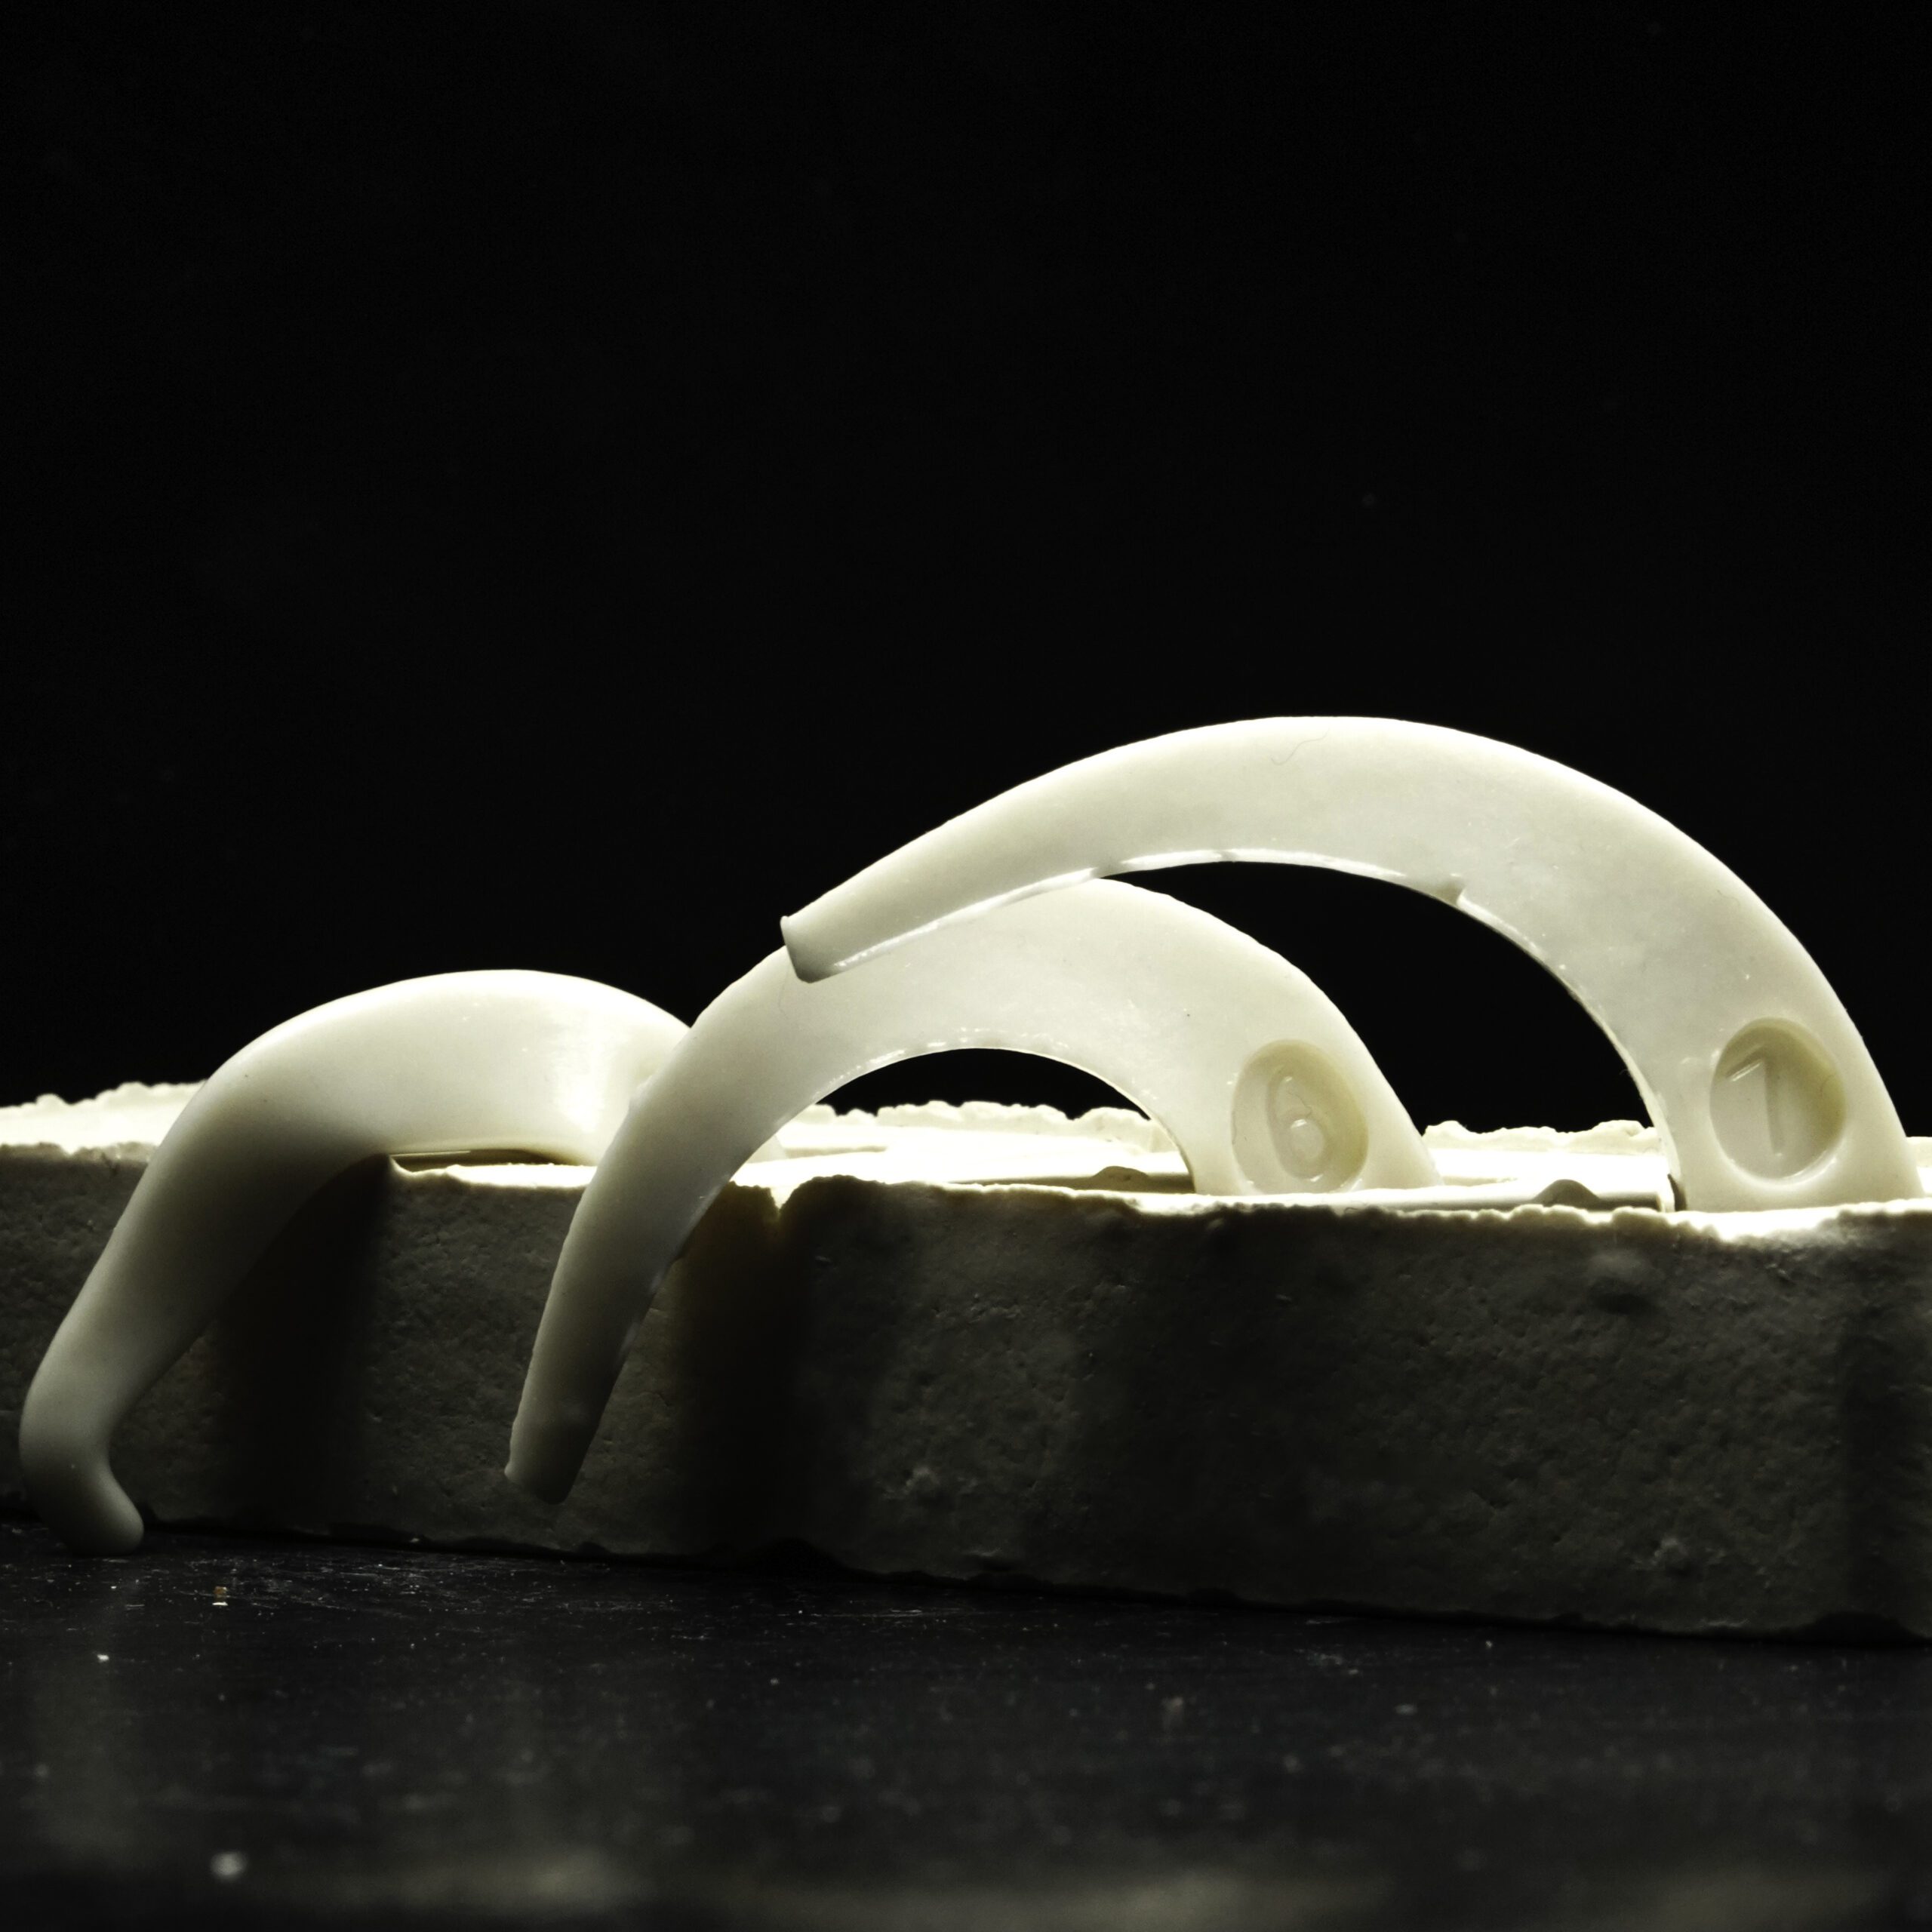
Orton’s Wisdom: Aim for Five O’Clock
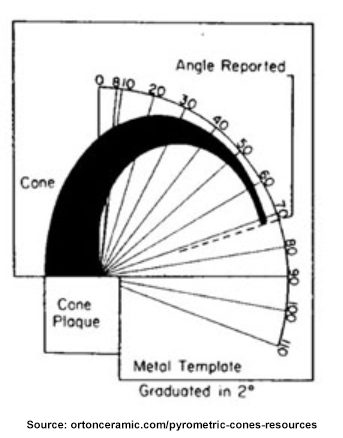
Orton’s instructions tell us that the cone should be pointing towards five o’clock for a complete temperature reading. This means the cone should be bent almost straight down, with its tip nearly touching the shelf.
Why Five O’Clock?
This might seem counterintuitive, but here’s the logic:
- Cones Don’t Start Upright: Cones actually begin at a slight angle, not perfectly vertical.
- 90-Degree Bend: Orton mentions a 90-degree bend as the ideal, but this refers to the actual bend on the cone itself, not the angle relative to the shelf.
Cone packs or cone plaques? Listen to CMW’s Podcast, For Flux Sake: Episode 71, Cone packs or cone plaques
Beyond the Bend: The Bigger Picture
Remember, the perfect cone bend is just one piece of the puzzle. It’s also crucial to consider factors like:
- Firing Rate: How quickly or slowly we heat the kiln.
- Kiln Atmosphere: Whether we’re firing in oxidation or reduction. (How do I create atmospheric effects in an electric kiln?)
- Clay and Glaze Compatibility: Matching the right cones to our clay and glazes.
By understanding the nuances of cone bending, we can fine-tune our firing process and achieve more consistent results. It’s all about paying attention to the details and using those cones as our trusty guides!
Want to make a ceramic glaze using a pyrometric cone? Watch CMW’s YouTube video: Cone-ception | Using a Pyrometric Cone to Create a Ceramic Glaze
Still Curious?
Maybe words on a screen aren’t enough and you need to see examples for yourself, we got the thing for you! Watch CMW’s Youtube video, Learn about Ceramic Cones!
Ready to dive deeper?
Loved learning about ceramic glazes? Want to go even deeper? Check out our Workshops & Courses, now available in Spanish, or YouTube Channel where Matt breaks it all down, myth-busting and Stull chart included!

