Ever gazed at a piece of pottery and wondered about what gives it its glossy, vibrant surface? That’s the power of ceramic glazes, and you might be surprised to learn how accessible creating your own can be.
Forget the limitations of store-bought glazes; it’s time to dive into the exciting realm of crafting custom finishes that reflect your unique artistic vision.
Let me stop you there… I need to back up another step! No problem! Check out CMW’s course, Glaze of Our Lives! It will cover all things glaze!
Why Venture into Homemade Glazes?
Imagine the thrill of holding a piece you’ve not only shaped but also colored with a glaze you formulated yourself. Creating your own glazes offers:
- Unparalleled Creative Freedom: Explore an endless spectrum of colors, textures, and effects, far beyond the constraints of commercial options.
- Precision and Control: Tailor your glazes to perfectly complement your chosen clay body and firing environment, ensuring optimal results.
- A Deeper Connection to Your Craft: Gain a profound understanding of the chemical interactions that transform raw materials into stunning finishes.
I’m struggling with the glaze application! Read CMW’s blog article: The Science Behind Glaze Application: Dipping, Brushing, Spraying
Your Glaze-Making Toolkit: Essential and Recommended
Before embarking on your glaze-making adventure, gather your tools:
- The Essentials:
- A precise digital scale: Accuracy is paramount for consistent results.
- Assorted mixing containers: Choose non-reactive materials like plastic or stainless steel.
- A sturdy mixing spoon or spatula.
- Safety gear: Dust mask, eye protection, and gloves are non-negotiable.
- A sponge and marking tools.
- The Recommended:
- An electric mixer: Streamlines the mixing process and ensures a smooth consistency.
- A fine-mesh sieve (60 mesh): Removes lumps and impurities for a flawless finish.
- Brushes and other application tools.
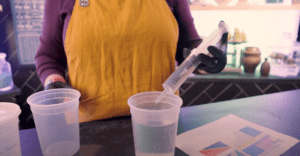
- A 60ml syringe for precise water measurements.
Let me stop you there… I need to back up another step! No problem! Check out CMW’s course, Glaze of Our Lives! It will cover all things glaze!
The Recipe for Success: “My Blue Heaven” and Beyond
We will be following along CMW’s YouTube video Batch, Please! which demonstrates the process using a glaze known as “My Blue Heaven,” providing a clear example of how to measure and combine raw materials.
The key is in the precise proportions of each ingredient. Now lets break it down:
The Glaze-Making Process: Step by Step
- Precise Measurement:
- Begin by carefully weighing each ingredient according to your chosen recipe, using a digital scale.
- Zero your scale before each measurement to ensure accuracy.
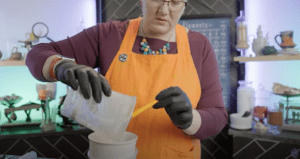
- Mixing:
- Combine the dry ingredients in your mixing container.
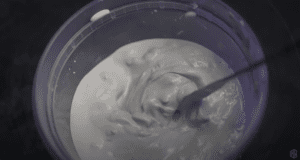
- Gradually add water, stirring continuously to create a smooth, creamy consistency.
- The target consistency is a heavy cream.

- Sieving for Smoothness:
- Pour the glaze through a fine-mesh sieve to remove any lumps or impurities.
- Use a brush to gently push the glaze through the sieve.
- Application Techniques:
- Apply the glaze to your test tiles using dipping, brushing, or spraying techniques.
- Multiple layers may be necessary to achieve the desired thickness and coverage.
- The Transformation: Firing and Results:
- Fire your glazed pieces in a kiln according to the specified temperature and firing schedule.
- Witness the remarkable transformation as the glaze melts and fuses to the clay surface.
- The video shows the difference between oxidation, and reduction firings, and how the same glaze can look completely different.
Oxidation vs. Reduction
The firing environment plays a crucial role in the final appearance of your glaze. Oxidation and reduction firings create distinct atmospheric conditions within the kiln, resulting in dramatic variations in color and texture.
Read more about the best kiln firing rates in CMW’s blog article: Ceramic Cone Chart: Deciphering Kiln Firing Rates for Best Results
Embrace the Journey of Discovery
Creating your own ceramic glazes is a journey of experimentation and discovery. Don’t be afraid to explore different recipes, techniques, and firing methods.
With practice and patience, you’ll unlock a world of creative possibilities and craft truly unique ceramic masterpieces.
Tip: Afraid to try out a homemade glaze on a work of art? Use a Test Tile! A small piece of clay that makes testing easier!
Ready to dive deeper?
Loved learning about ceramic glazes? Want to go even deeper? Check out our Workshops & Courses, now available in Spanish, or YouTube Channel where Matt breaks it all down, myth-busting and Stull chart included!
")


