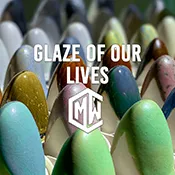
Ready to take your ceramic pieces from great to jaw-dropping? If you’ve mastered the basics, it’s time to dive into the world of specialty glazes that create truly unique finishes. Forget uniform colors and perfect surfaces—these techniques are all about texture, shine, and expressive flair.
What is Gloop?
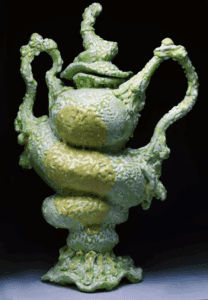
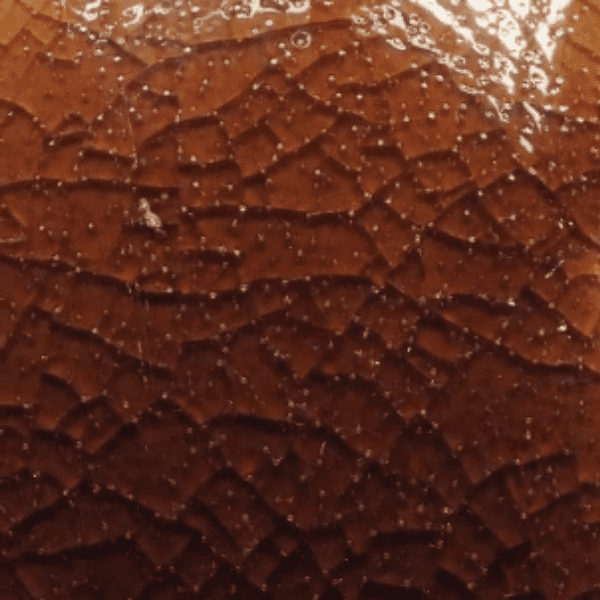
If you’ve ever wanted to make a glaze run, drip, and form thick, sculptural mounds, Gloop is your new best friend. This isn’t your average fluid glaze—it’s formulated to be thick and viscous, like a delicious, syrupy honey.
You can apply it in thick layers, and it will hold its shape! During firing, it melts but stays thick, slowly flowing like lava before freezing in place. This creates amazing, high-relief textures and drips that add a playful, gooey dimension to your work. It’s perfect for creating a bold, drippy edge or a sculptural surface that begs to be touched.
Artist Megan (@schmegma on Instagram) has helped popularize the playful possibilities of Gloop in contemporary ceramics, showing how it can completely transform a surface from flat to fabulously dimensional.
Origins of Gloop
The idea of using glaze as a sculptural medium isn’t entirely new—potters have long experimented with over-firing glazes to encourage runs and drips. However, traditional glazes are made to avoid that kind of chaos. Gloop was developed as a commercial specialty glaze that embraces thickness and flow, intentionally engineered to hold its gooey form without completely flattening or burning off in the kiln.
It emerged as part of a wave of new ceramic materials that encourage experimentation and “breaking the rules.” Think of it as the rebellious cousin of traditional glaze: instead of aiming for control and consistency, Gloop invites surprise, play, and an almost candy-like excess.
I’m curious about other special effect glazes! Read Beyond the Gloss: Unleash the Magic of Special Effects Glazes in Your Pottery NOW!
Best Practices for Using Gloop
Like all specialty materials, Gloop rewards experimentation but has a few key tips that can save you headaches:
- Surface Prep Matters – Apply Gloop over bisque-fired ceramics, just like any glaze. A smoother surface will emphasize drips, while a textured underlayer will create complex pooling.
- Layer it On – Don’t be shy—Gloop is made to be applied thickly. Brushing, pouring, or even ladling it onto a surface can create different sculptural effects.
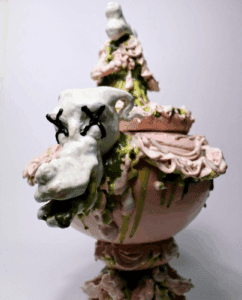
- Think About Gravity – Since Gloop moves slowly during firing, placement matters. Vertical surfaces will emphasize dripping “icicles,” while horizontal surfaces will form bubbly, frosting-like textures.
- Mind the Edges – Always stilt or protect kiln shelves, as Gloop can run off if over-applied near edges. Many artists place sacrificial tiles beneath their work to catch runaway drips.
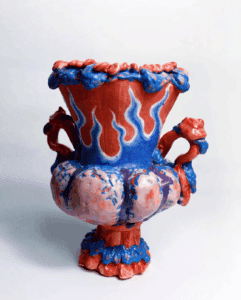
- Experiment with Layering – Try applying Gloop over or under other glazes. Transparent glazes on top can magnify the glossy drips, while matte glazes beneath can create contrast. Don’t be afraid to learn from your mistakes!
- Firing Range – Most commercial Gloop products are formulated for midrange (cone 5–6) oxidation firing, though some artists experiment at lower or higher temps to alter the movement. Always check the manufacturer’s notes.
Why Use Gloop?
Gloop’s charm lies in its ability to push ceramic surfaces beyond the predictable. It’s perfect if you want to:
- Add dramatic drippy edges to mugs, bowls, or vases.
- Create frosting-like textures that look edible (but aren’t!).
- Emphasize the fluidity of glaze as a medium, turning glaze into sculpture.
- Bring a sense of humor, fun, and playfulness to functional pottery.
It’s also an invitation to embrace imperfection. Where traditional glaze aims for smooth coverage, Gloop celebrates gravity, flow, and accidents as part of the final aesthetic.
Final Thoughts
Whether you’re looking to give your work a candy-coated vibe or transform glaze into a sculptural partner, Gloop is a material that thrives on boldness. It’s not about perfection—it’s about letting go and seeing where the gooey magic takes you.
So, grab a brush (or a ladle), slather it on, and let the kiln do the rest. Your ceramics might just end up looking delicious.
The Megan Whetstine Memorial Scholarship
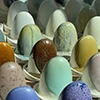
In loving memory of our valued colleague and friend, Megan Whetstine, Ceramic Materials Workshop is honored to establish this memorial scholarship. Megan was a vital part of our team, and her dedication, passion, and spirit brightened our community. This scholarship seeks to carry forward her legacy by investing in the growth of other devoted ceramic artists. All the art featured in this blog is from Megan!

Our mission with this scholarship is to support an emerging artist who is at a crucial stage in their development—transitioning from passionate practice to a sustainable, lifelong profession. We aim to provide a pivotal learning opportunity for an individual dedicated to deepening their technical and material knowledge, empowering them to achieve new heights in their work.
Wanting more Special Effect Glazes!?
How does glow in the dark sound?? It’s not as magical as it sounds, but it’s definitely achievable with the right glaze recipe and firing technique. In this video post, Rose explores the science behind glow-in-the-dark glazes and what you can do to make your own.
Ready to dive deeper?
Loved learning about ceramic glazes? Want to go even deeper? Check out our Workshops & Courses, now available in Spanish, or YouTube Channel where Matt breaks it all down, myth-busting and Stull chart included!


